

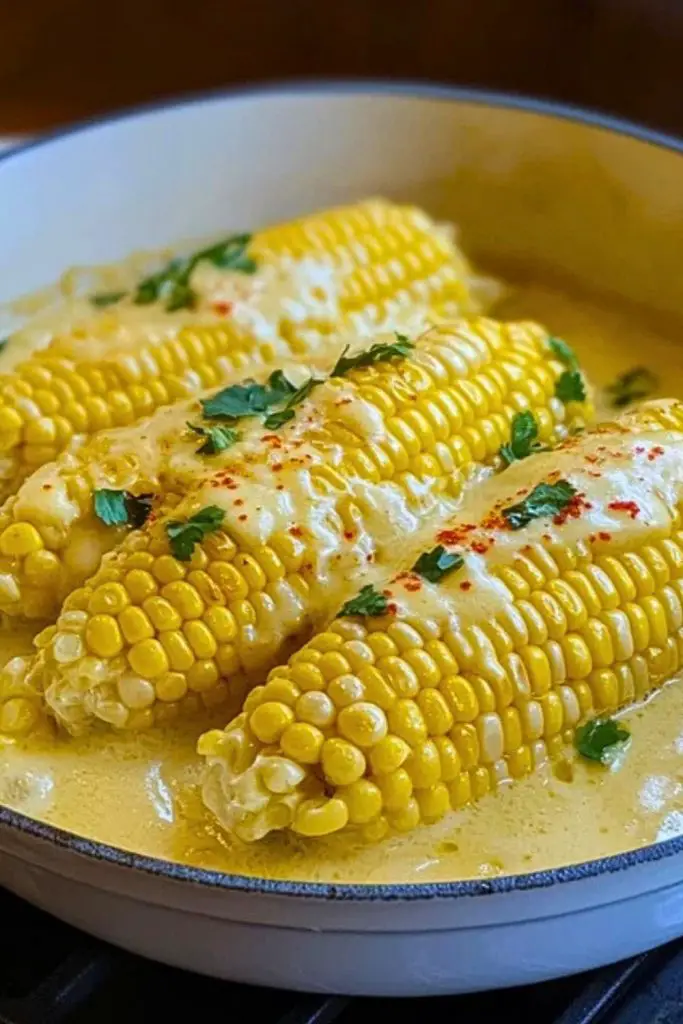
Golden, juicy, and coated in a luscious buttery bath—Butter Boiled Corn on the Cob is the ultimate side dish that brings comfort and flavor to the table. This dish takes your classic corn on the cob and elevates it with a rich, creamy blend of butter, milk, and simple seasonings that soak into every kernel. The result? A soft, flavorful cob with hints of sweetness and a smooth, velvety texture that melts in your mouth.

Perfect for summer barbecues, weeknight dinners, or cozy comfort meals, this buttery corn is a crowd-pleaser for all ages. It’s quick to prepare and absolutely indulgent without being complicated. Whether you’re pairing it with grilled meats or enjoying it solo with a sprinkle of herbs and paprika, this buttery creation will have everyone reaching for seconds.
Ingredients for Butter Boiled Corn on the Cob
- 4–6 ears of fresh corn, husked and cleaned
- 1 cup (2 sticks) unsalted butter
- 2 cups whole milk
- 1–2 teaspoons salt (to taste)
- 1/2 teaspoon black pepper
- 1/2 teaspoon smoked paprika (optional, for garnish)
- Fresh parsley or cilantro, chopped (for garnish)
- Water (enough to submerge the corn halfway)

Step 1: Prepare the Corn
Start by husking the corn and removing all the silk strands. Rinse each ear under cold water to ensure they’re completely clean. If the ears are too large for your pot, you can break them in half for a better fit.
Step 2: Set Up the Buttery Boil
In a large deep pan or Dutch oven, add the butter, milk, and just enough water to cover the corn halfway. Stir in the salt and black pepper. Place the pot over medium heat and allow the butter to melt completely, stirring occasionally to combine everything into a rich, creamy liquid.
Step 3: Boil the Corn
Once the buttery mixture is simmering (not boiling aggressively), carefully place the ears of corn into the pot. Lower the heat slightly and let the corn cook gently for about 8–10 minutes, turning occasionally so each side soaks evenly in the buttery bath.
Step 4: Infuse and Serve
After cooking, use tongs to remove the corn and place it on a serving dish. Spoon some of the buttery liquid over the top. Garnish with smoked paprika and chopped parsley or cilantro for a touch of color and extra flavor. Serve hot and enjoy!
Storage Instructions
If you have any leftover Butter Boiled Corn on the Cob, don’t worry—it stores well and can be repurposed into salads, soups, or stir-fries.
- Refrigerator: Allow the corn to cool to room temperature, then wrap each ear in foil or place in an airtight container. Store in the fridge for up to 3 days.
- Freezer: Remove the kernels from the cob and store them in a freezer-safe bag or container. They can last up to 2 months in the freezer.
- Reheating: To reheat, simply wrap in foil and warm in a 350°F (175°C) oven for 10–15 minutes, or microwave with a bit of extra butter for 1–2 minutes.
Estimated Nutrition (Per ear of corn)
- Calories: ~220
- Total Fat: 17g
- Saturated Fat: 10g
- Cholesterol: 45mg
- Sodium: 350mg
- Carbohydrates: 18g
- Fiber: 2g
- Sugar: 6g
- Protein: 3g
Note: These values may vary based on exact portion sizes and ingredient brands used.
Frequently Asked Questions
1. Can I use frozen corn instead of fresh?
Yes! Just thaw the frozen corn before boiling to ensure even cooking and butter absorption.
2. Can I make this dairy-free?
Absolutely. Substitute the butter with plant-based butter and use unsweetened almond or oat milk.
3. How long should I boil the corn?
Typically 8–10 minutes is enough. The kernels should be tender but still have a slight bite.
4. Can I add cheese or other toppings?
Definitely. Crumbled cotija, parmesan, or shredded cheddar go wonderfully on top.
5. What herbs go well with this?
Fresh parsley, cilantro, or even a sprinkle of thyme can complement the buttery flavor beautifully.
6. Is this recipe spicy?
Not by default. If you’d like heat, sprinkle in cayenne or chili flakes to the butter mix.
7. Can I make this ahead of time?
Yes, you can boil the corn and store it in the buttery liquid in the fridge. Reheat gently before serving.
8. What can I serve with butter boiled corn?
It pairs well with grilled meats, burgers, roasted veggies, or as part of a hearty picnic spread.

Butter Boiled Corn on the Cob
- Total Time: 15 minutes
- Yield: 4–6 servings
Description
Experience a bite of summer with this rich and creamy Butter Boiled Corn on the Cob. Sweet, juicy corn simmers in a luxurious bath of butter and milk, infusing every golden kernel with comforting flavor. Whether you’re looking for an easy dinner side, a quick summer recipe, or family-friendly food ideas, this dish hits all the right notes. It’s indulgent without being fussy, and it turns simple corn into a buttery, crave-worthy treat perfect for backyard barbecues or cozy weeknight meals. If you’re after quick vegetable recipes, delicious dinner ideas, or just a reason to savor seasonal produce, this easy recipe is it.
Ingredients
4–6 ears of fresh corn, husked and cleaned
1 cup (2 sticks) unsalted butter
2 cups whole milk
1–2 teaspoons salt (to taste)
1/2 teaspoon black pepper
1/2 teaspoon smoked paprika (optional, for garnish)
Fresh parsley or cilantro, chopped (for garnish)
Water (enough to submerge the corn halfway)
Instructions
- Husk the corn and remove all silk. Rinse well.
- In a large pot, add butter, milk, water, salt, and pepper. Heat on medium until the butter melts.
- Place corn into the pot once the mixture is gently simmering.
- Cook the corn for 8–10 minutes, turning occasionally for even soaking.
- Remove the corn with tongs and place on a platter.
- Spoon buttery liquid over the top and garnish with paprika and herbs.
- Serve hot and enjoy!
- Prep Time: 5 minutes
- Cook Time: 10 minutes
- Category: Side Dish