

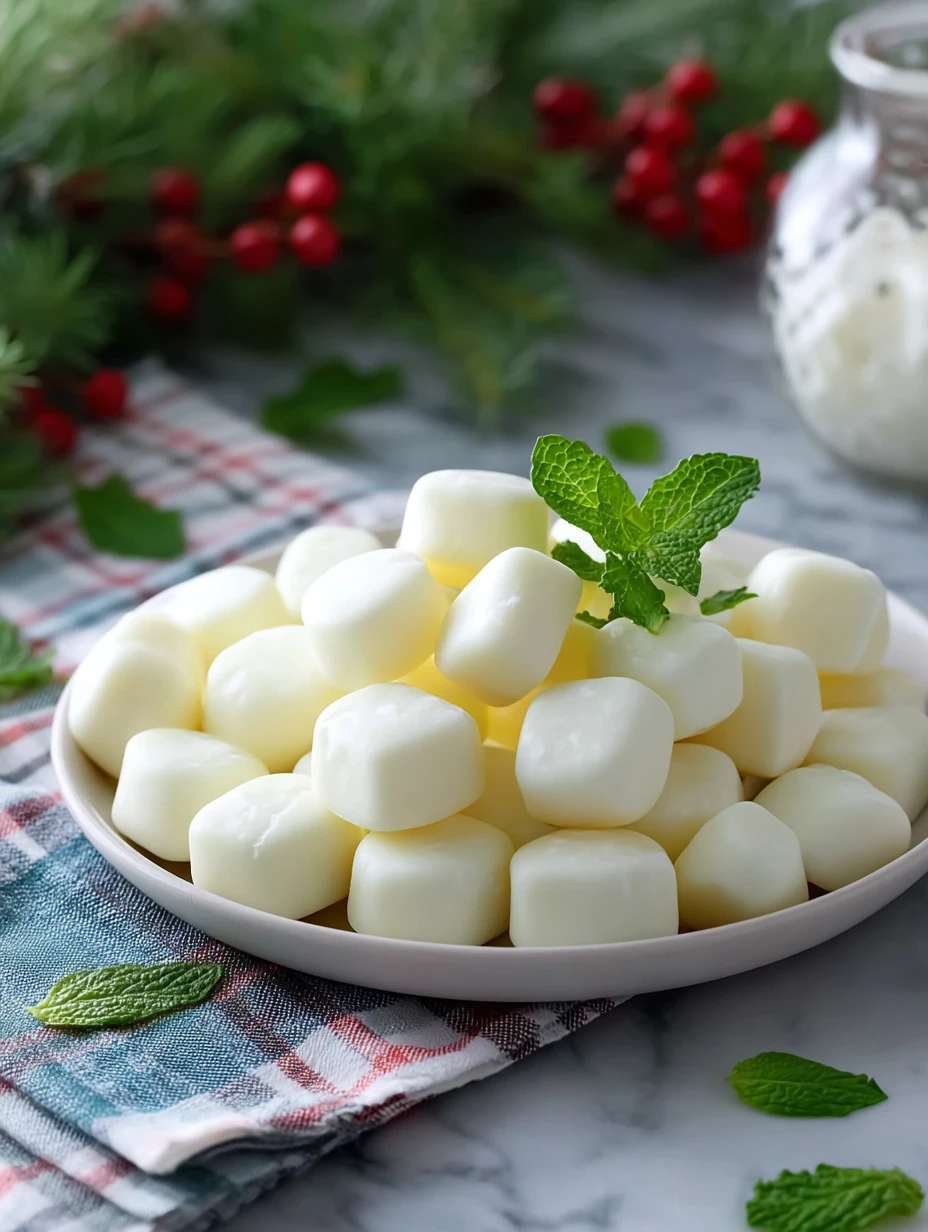
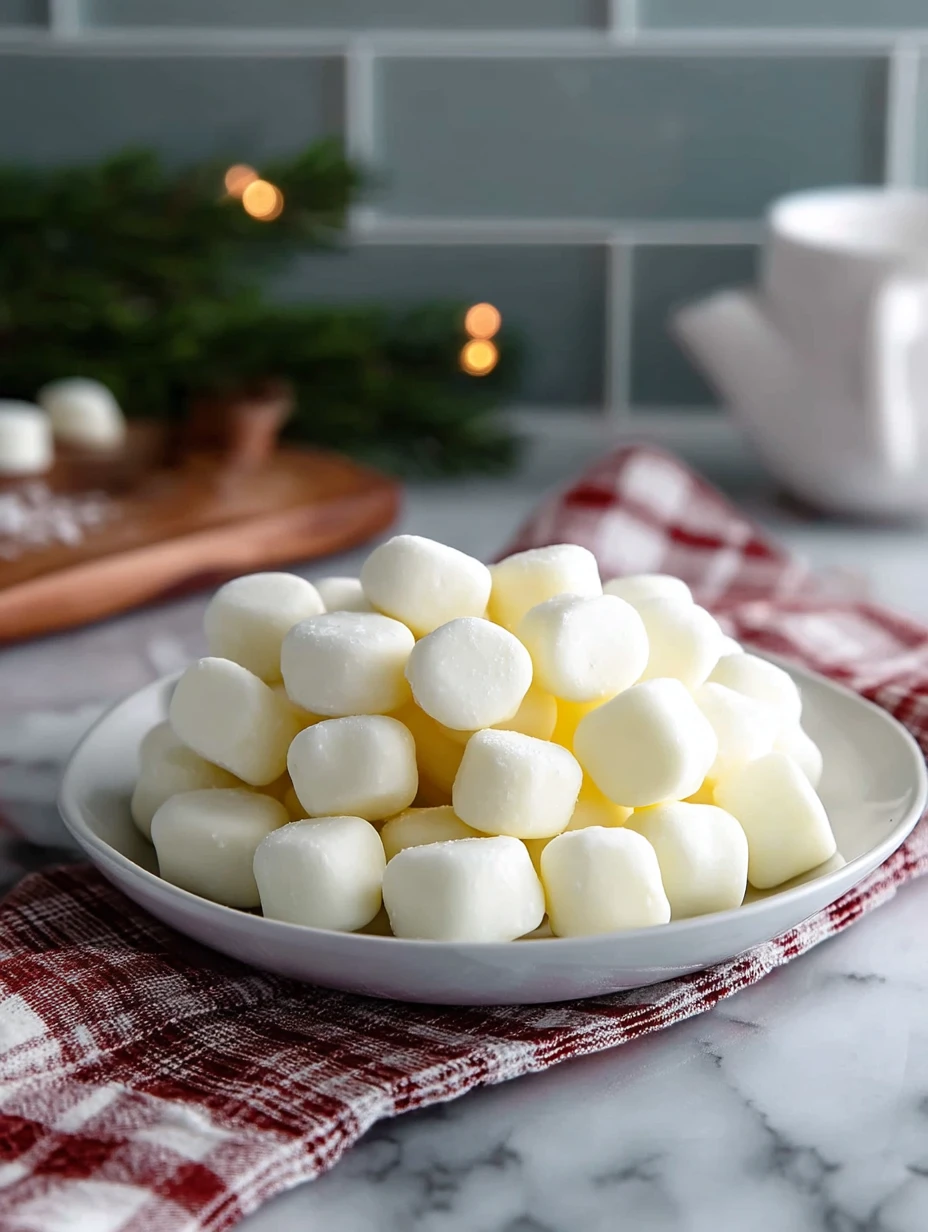
There’s something wonderfully nostalgic about a dish that doesn’t need an oven, a timer, or even a special occasion to impress. These Easy Butter Mints are exactly that kind of treat—melt-in-your-mouth little pillows of buttery, minty sweetness that feel like they came straight from a cozy old-fashioned candy shop.

I love making a batch right before the holidays, but honestly, they’re just as perfect for baby showers, weddings, and after-dinner treats when you want a sweet bite that feels light, refreshing, and homemade. The best part? You only need a handful of simple ingredients and a bit of patience while the mints dry.
What Makes These Easy Butter Mints So Irresistible?
If you grew up sneaking those pastel butter mints from crystal bowls at grandma’s house or at wedding receptions, you already know the charm of this classic candy. My version keeps that old-school flavor but streamlines the process so you can whip them up without candy thermometers or fussy techniques.
The texture is dreamy—soft at first bite, then dissolving slowly on your tongue. The butter gives them richness, the cream makes them velvety, and the peppermint leaves your mouth cool and refreshed. They’re also incredibly customizable: you can keep them a clean, elegant ivory like in the photo or tint them in soft pastel colors to match any holiday or party theme.
Ingredients for Easy Butter Mints
When I make butter mints, I like to keep the ingredient list short and straightforward. Each element has a job to do in getting that perfect, meltaway texture.
Unsalted butter – This is the backbone of the candy. The butter brings that creamy richness and helps the mints melt instead of crunch. Unsalted gives you more control over the final flavor.
Heavy cream – Just a splash softens the mixture and keeps the mints velvety and smooth. It also helps bind the powdered sugar into a workable dough.
Powdered sugar – The main sweetener and the structure of the mints. Because it’s so fine, it dissolves gently on your tongue instead of feeling gritty.
Peppermint extract – This is where the classic mint flavor comes from. A little goes a long way, giving you that cool, refreshing finish that makes these perfect after a rich meal.
Vanilla extract – Just a touch rounds out the mint and butter so the candy tastes warm and well-balanced instead of sharp or one-note.
Fine sea salt – A tiny pinch wakes up all the flavors and keeps the sweetness from tasting flat.
Gel food coloring (optional) – If you want pastel butter mints for Christmas, Easter, or baby showers, a drop or two of gel coloring in different portions of the dough gives you a gorgeous variety of colors.
How To Make the Easy Butter Mints
Step 1: Cream the Butter and Flavorings
I start by beating the softened unsalted butter until it’s light and creamy. Then I mix in the heavy cream, peppermint extract, vanilla, and a small pinch of salt. At this stage, the mixture should look smooth and fluffy and already smell like a little mint bakery.
Step 2: Add the Powdered Sugar
Next, I add the powdered sugar gradually. This is important so the sugar doesn’t puff everywhere and so the dough has time to come together. I keep mixing until the mixture turns from glossy and soft into a thick, dough-like consistency that pulls away from the sides of the bowl.
Step 3: Adjust the Texture
Once the powdered sugar is in, I touch the dough. It should feel soft but not sticky—almost like play dough. If it’s still sticky, I sprinkle in a bit more powdered sugar. If it feels too stiff or crumbly, a tiny splash of cream brings it back to life.
Step 4: Tint the Dough (Optional)
If I’m using food coloring, I divide the dough into portions and knead a small drop of gel coloring into each one. Gel works best, because it doesn’t water down the dough. You can go for traditional holiday shades, pretty pastels, or keep them all one elegant color.
Step 5: Roll into Ropes
On a surface lightly dusted with powdered sugar (not flour), I roll each portion of dough into long ropes about 1/2 inch thick. If the dough feels too soft to roll, I chill it for 10–15 minutes and then try again.
Step 6: Cut into Mints
Using a sharp knife or bench scraper, I cut the ropes into small pillows, about 1/2 inch each. This goes quickly, and you’ll suddenly see a whole army of little butter mints covering your board.
Step 7: Dry the Mints
I spread the cut mints out in a single layer on a parchment-lined baking sheet or a sheet of wax paper. They need time to dry and firm up on the outside, so I let them sit at room temperature, uncovered, for at least 12 hours or overnight. This step gives them that classic, slightly crisp exterior with a soft, creamy center.
Step 8: Store and Enjoy
Once the mints feel dry to the touch, I transfer them to an airtight container. At this point they’re ready to serve, gift, or stash in the freezer for later.
Serving and Storing Your Easy Butter Mints
These Easy Butter Mints are made for sharing. I love piling them into small bowls or pretty jars for holiday dessert tables, baby showers, wedding receptions, or even casual family dinners when I want a simple after-dinner sweet.
For storing, I let the mints fully dry first so they don’t stick together. Then I keep them in an airtight container at cool room temperature for up to 2 weeks. If your kitchen runs warm, you can refrigerate them; just bring them back to room temperature before serving so the texture softens again.
Butter mints also freeze beautifully. Place them in a single layer on a baking sheet to freeze, then transfer to a freezer-safe bag or container. They’ll keep for about 2 months. When you’re ready to serve, thaw them in the fridge, then at room temperature so they don’t sweat.
What to Serve With Easy Butter Mints
Hot Chocolate or Coffee Bar
Set a bowl of butter mints next to your hot chocolate or coffee bar. Guests can nibble on them between sips, or even drop a mint into a mug for a creamy peppermint twist.
Holiday Cookie Platters
I like mixing these mints onto dessert trays with cookies and bars. They pair especially nicely with rich treats like brownies or chocolate chip cookie bars, adding a light, refreshing bite between all the chocolate.
Fruit and Cheese Boards
Believe it or not, a few butter mints on a grazing board are a fun surprise. After salty cheeses and fresh fruit, that sweet minty finish is a nice palate cleanser.
After-Dinner Dessert for Two
If you’ve already had a big dinner and don’t want a heavy dessert, a small handful of these mints with a cup of tea or coffee is just enough to satisfy a sweet tooth.
Party Favors and Gift Jars
Spoon the mints into mini jars or clear treat bags, tie them with ribbon, and you’ve got an easy homemade gift for holidays, bridal showers, or office parties.
Bridal or Baby Shower Sweets Table
Their soft colors and delicate texture make these mints perfect for shower dessert tables. Match the colors to the party theme and watch them disappear.
Want More Candy Treat Ideas?
If these Easy Butter Mints have you in a candy-making mood, you’ll love exploring more sweet bites from the ChefAlchemy kitchen. Try one of these next:
- Bright and tangy Two-Ingredient Lemon Bars for a no-fuss citrus dessert that pairs beautifully with minty candies.
- Luxe Chocolate Raspberry Drip Cake when you’re craving a showstopper cake to serve alongside a bowl of butter mints.
- Festive Cake Mix Chocolate Chip Santa Cookies for easy holiday cookie trays packed with color and fun.
- Rich and chewy Double Chocolate Chip Cookies if you want a deep chocolate contrast to these light, buttery mints.
Save This Pin For Later
📌 Save this Easy Butter Mints recipe to your favorite dessert or holiday Pinterest board so you can find it again the next time you need a quick, make-ahead sweet.
When you make a batch, I’d love to hear how you serve them. Did you tint them in pastel colors, keep them classic ivory, or play with different mint strengths? Share your tweaks and questions in the comments so we can keep trading candy tips.
For even more small-batch sweets, easy candy recipes, and everyday dessert ideas, explore my creations over on ChefAlchemy’s Pinterest boards.
Print
Easy Butter Mints
- Total Time: 1 hour 25 minutes
- Yield: about 80 butter mints (20 servings of 4 mints each)
- Diet: Vegetarian
Description
If you’ve ever snuck a pastel mint from a crystal candy dish and wished you could recreate that moment at home, these Easy Butter Mints are your shortcut to pure nostalgia. This no-bake candy is rich, creamy, and softly minty, with a melt-in-your-mouth texture that feels fancy enough for holidays yet simple enough for everyday snacking. They’re a perfect make-ahead sweet for quick dessert ideas, holiday parties, after-dinner treats, or whenever you want an easy recipe that turns basic pantry ingredients into something special. Whether you need quick breakfast or brunch nibbles, fun party food ideas, or bite-size dessert and snack inspiration, these homemade butter mints fit right in with all your favorite dessert and dinner ideas.
Ingredients
1/2 cup unsalted butter softened
1/4 cup heavy cream
4 cups powdered sugar sifted
1 teaspoon peppermint extract
1 teaspoon vanilla extract
1/8 teaspoon fine sea salt
2 to 3 drops gel food coloring optional
Instructions
1. In a mixing bowl, beat the softened unsalted butter with an electric mixer until smooth, creamy, and light in color.
2. Add the heavy cream, peppermint extract, vanilla extract, and fine sea salt to the bowl and beat again until everything is fully combined and fragrant.
3. Gradually add the powdered sugar, about 1 cup at a time, mixing on low at first so it doesn’t puff everywhere, then increasing the speed until the mixture forms a thick, smooth dough.
4. Once all of the powdered sugar is incorporated, check the texture of the dough; it should feel soft but not sticky and hold together like play dough.
5. If the dough feels sticky, beat in a small spoonful of additional powdered sugar; if it feels dry or crumbly, add a tiny splash of cream and mix again until it smooths out.
6. For colored mints, divide the dough into separate portions and knead a drop or two of gel food coloring into each portion until the color is evenly distributed.
7. On a work surface lightly dusted with powdered sugar, roll each portion of dough into long ropes about 1/2 inch thick.
8. Using a sharp knife or bench scraper, cut each rope into small pillow-shaped pieces about 1/2 inch long, arranging them in a single layer on a parchment- or wax-paper-lined baking sheet.
9. Let the cut butter mints sit out at room temperature, uncovered, for at least 12 hours or overnight so they can dry and firm up on the outside.
10. Once the mints are dry to the touch, transfer them to an airtight container and store at cool room temperature for up to 2 weeks, or freeze for longer storage.
Notes
For the best melt-in-your-mouth texture, make sure the butter is truly softened before you start and give the mints plenty of time to dry so they develop a delicate outer shell.
Peppermint extract is strong, so start with the amount listed and taste the dough; if you prefer a bolder mint flavor, add just a few extra drops at a time, mixing and tasting as you go.
- Prep Time: 25 minutes
- Cook Time: 0 minutes
- Category: Dessert
- Method: No-Bake
- Cuisine: American
Nutrition
- Serving Size: 4 mints
- Calories: 144
- Sugar: 24
- Sodium: 10
- Fat: 8
- Saturated Fat: 5
- Unsaturated Fat: 3
- Trans Fat: 0
- Carbohydrates: 25
- Fiber: 0
- Protein: 0
- Cholesterol: 30
Keywords: butter mints, easy butter mints, homemade mints, Christmas candy, holiday treats, no bake candy, make ahead dessert, party mints