

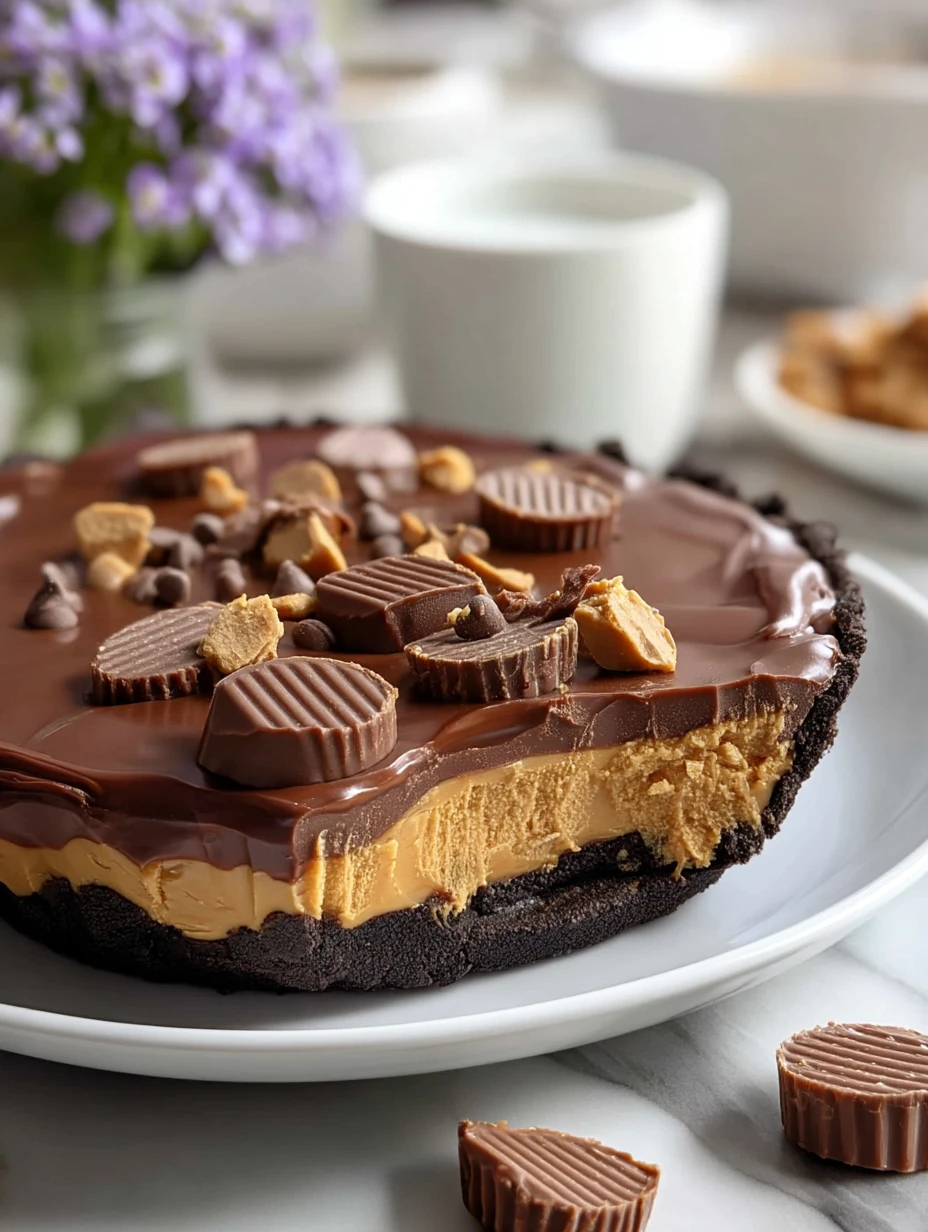
If you’ve ever wished you could turn your favorite candy into a full-on, fork-worthy dessert, this Giant Reese’s Peanut Butter Cup is your dream come true. Imagine a thick Oreo cookie crust, a silky layer of chocolate fudge, a fluffy peanut butter cheesecake filling, and a glossy chocolate ganache drip, all crowned with a mountain of chopped mini Reese’s cups.

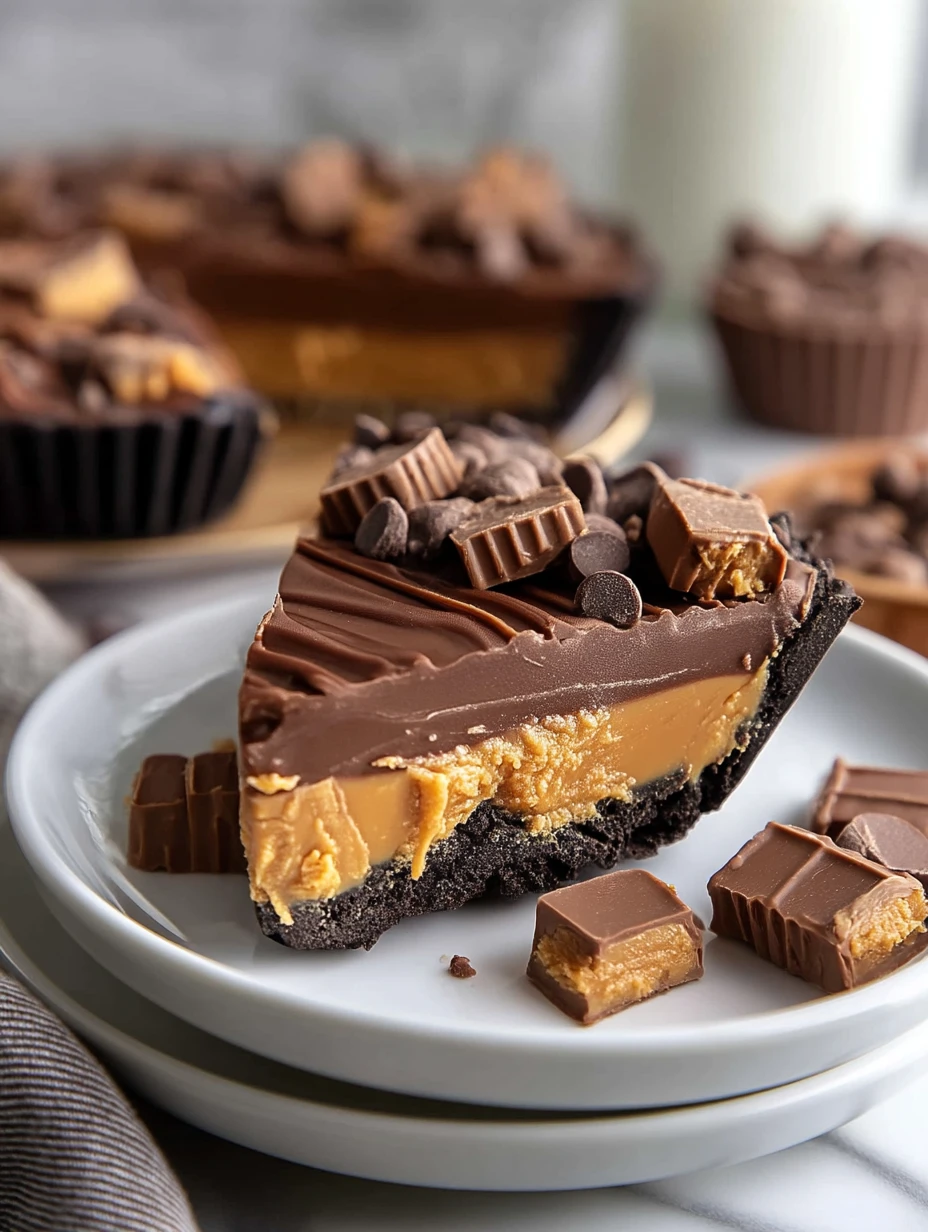
When I serve this, people go quiet for a moment, then you hear little happy sighs around the table. It slices like a decadent chocolate peanut butter pie but looks exactly like a supersized candy bar. The best part? It’s mostly no-bake and can be made entirely ahead of time, so your dessert is ready long before guests arrive.
What Kind of Peanut Butter Works Best for a Giant Reese’s Peanut Butter Cup?
For this recipe, I always grab a creamy, shelf-stable peanut butter—the kind you’d pack in a lunchbox, not the oily natural variety that separates in the jar. Natural peanut butter is delicious on toast, but in a no-bake cheesecake-style filling it can cause the mixture to loosen and separate.
A classic creamy peanut butter gives you that nostalgic Reese’s flavor and a perfectly smooth texture that whips up light and fluffy. If you really want to lean into the candy-bar vibe, choose a brand that’s a little salty and sweet; that contrast against the rich chocolate layers makes every bite taste like a bakery-level dessert.
Ingredients for the Giant Reese’s Peanut Butter Cup
I built this dessert in layers so each bite has crunch, fudge, creaminess, and candy-bar pops of peanut butter.
Oreo cookie crust – Crushed chocolate sandwich cookies form the base and sides of our giant “cup,” giving deep cocoa flavor and that classic Reese’s ridged edge when pressed up the pan.
Melted butter – Binds the cookie crumbs together so the crust slices cleanly and doesn’t crumble when you remove each wedge.
Semi-sweet chocolate chips – Melted with cream and butter, they become the fudgy chocolate layer on the bottom and the glossy ganache drip on top.
Heavy cream – Adds richness and silkiness to both the fudge layer and ganache, and it whips into soft peaks for the peanut butter cheesecake filling.
Cream cheese – The backbone of the filling. It gives the pie structure, tang, and that cheesecake-style creaminess that balances the sweetness.
Creamy peanut butter – The star flavor. It blends with cream cheese and whipped cream for a filling that tastes exactly like the inside of a Reese’s cup but lighter and mousse-like.
Powdered sugar – Sweetens the filling while keeping the texture smooth and lump-free.
Vanilla extract – Rounds out the flavors and adds a bakery-style aroma to the filling.
Fine salt – Just a pinch sharpens the chocolate and peanut butter flavors, keeping the dessert from tasting flat.
Mini Reese’s peanut butter cups – Chopped and scattered generously over the top so every slice is absolutely loaded with candy.
Chocolate curls or shavings (optional) – A little flourish on top for extra drama and texture.
How To Make the Giant Reese’s Peanut Butter Cup
Step 1: Build the Oreo Cookie Crust
Start by pulsing your chocolate sandwich cookies in a food processor until they turn into fine crumbs. You want them evenly ground so the crust packs tightly. Stir in the melted butter until every crumb looks slightly damp and the mixture holds together when pressed between your fingers.
Press the crumbs firmly into the bottom and up the sides of a 9-inch deep-dish tart pan or springform pan. Take your time here—use the flat bottom of a measuring cup to really compact the crumbs so they don’t crumble later. Bake the crust at 350°F (175°C) for about 8–10 minutes, just until fragrant, then let it cool completely.
Step 2: Pour In the Fudgy Chocolate Layer
While the crust cools, make a quick fudge layer. Warm heavy cream on the stovetop or in the microwave until it’s steaming but not boiling. Pour it over semi-sweet chocolate chips and let the mixture sit for a minute to soften the chocolate.
Whisk until smooth and glossy, then whisk in a bit of butter for extra shine. Spread this chocolate mixture over the bottom of the cooled crust. Slide the pan into the fridge for 20–30 minutes so the chocolate firms up enough to support the peanut butter filling.
Step 3: Whip Up the Peanut Butter Cheesecake Filling
In a large mixing bowl, beat the softened cream cheese until it’s completely smooth and free of lumps. Add the creamy peanut butter, powdered sugar, vanilla, and a pinch of salt, then mix until everything is thick, silky, and well combined.
In a separate chilled bowl, whip cold heavy cream to medium-stiff peaks. You want it fluffy but still spreadable. Gently fold the whipped cream into the peanut butter mixture in two or three additions, taking care not to deflate it. The result should be airy and mousse-like.
Step 4: Fill and Chill
Spread the peanut butter filling over the chilled fudge layer, smoothing the top with an offset spatula. I like to slightly dome it in the center so the finished dessert really looks like a giant peanut butter cup.
Cover the pan tightly with plastic wrap and refrigerate for at least 4 hours, or overnight, until the filling is completely set. This chill time makes slicing much cleaner and helps the layers stay defined.
Step 5: Add the Ganache Drip
When you’re almost ready to serve, make a simple ganache for the top. Warm more heavy cream until steaming, then pour it over another bowl of semi-sweet chocolate chips. Let it sit for a minute, then stir until smooth. If you want an extra glossy finish, whisk in a teaspoon of corn syrup or a small knob of butter.
Let the ganache cool until it thickens slightly but is still pourable. Remove the chilled peanut butter cup from the pan, place it on a serving plate, and slowly pour the ganache on top, nudging it toward the edges so it drips down the sides like a classic Reese’s cup.
Step 6: Crown It With Reese’s Cups
While the ganache is still a bit soft, pile chopped mini Reese’s peanut butter cups over the top. I go heavy here so every slice is absolutely loaded with candy. Add chocolate curls or shavings if you like a little extra drama.
Return the dessert to the fridge for about 20 minutes so the ganache can set just enough to hold the toppings in place. After that, you’re ready to slice and serve.
Serving and Storing This Giant Reese’s Peanut Butter Cup
For the cleanest slices, use a long, sharp knife dipped in hot water and wiped dry between cuts. Because the layers are rich, I usually cut this dessert into 10–12 narrow wedges. No one has ever complained about the portion size.
This giant peanut butter cup is best served chilled but not rock-hard. If your fridge runs very cold, let the dessert sit at room temperature for about 10 minutes before slicing so the filling softens slightly.
Leftovers keep beautifully. Cover the pan or transfer slices to an airtight container and store in the refrigerator for up to 5 days. The crust stays pleasantly crisp and the filling holds its shape.
You can also freeze individual slices. Place them on a parchment-lined baking sheet until firm, then wrap each slice well and store in an airtight container for up to 2 months. Thaw in the refrigerator overnight before serving.
What to Serve With Giant Reese’s Peanut Butter Cup?
Strong Coffee or Espresso
A bold, unsweetened coffee or a shot of espresso cuts through all that richness and makes every bite taste even more chocolatey.
Cold Brew or Iced Latte
If you’re serving this for a summer gathering, pour tall glasses of cold brew or iced lattes. The chilled coffee plus chilled dessert is such a good combo.
Vanilla Ice Cream
For true dessert lovers, add a scoop of vanilla bean ice cream on the side. The mild flavor and cold creaminess pair perfectly with the intense chocolate and peanut butter.
Fresh Berries
A handful of fresh raspberries or sliced strawberries brings a little brightness and acidity that keeps the dessert from feeling too heavy.
Salted Peanuts
Scatter a few roasted salted peanuts over each plate for extra crunch and a bigger salty-sweet contrast.
Whipped Cream
A soft dollop of lightly sweetened whipped cream adds airiness and makes each bite feel a bit lighter.
Simple Milk or Chocolate Milk
For kids—or adults who are kids at heart—a cold glass of milk or chocolate milk is classic with anything peanut butter and chocolate.
Want More Chocolate & Peanut Butter Dessert Ideas?
If this Giant Reese’s Peanut Butter Cup disappears faster than you expect, you’ll probably love these other treats too:
- Chocolate Peanut Butter Poke Cake for a moist, crowd-pleasing cake soaked in peanut butter goodness.
- Easy Cheesecake Cups when you want individually portioned cheesecakes for parties or potlucks.
- Biscoff Cheesecake for a cookie-butter twist that delivers the same creamy, indulgent feel.
- Classic Cherry Delight if you’re craving a retro-style no-bake dessert with a fruity finish.
Save This Pin For Later
📌 Save this Giant Reese’s Peanut Butter Cup to your favorite dessert board on Pinterest so you can come back to it any time you’re craving something over-the-top.
When you make it, I’d love to hear how yours turned out. Did you use all mini Reese’s, or mix in chopped full-size cups too? Did you go with a simple ganache or add extra drizzle and toppings?
Share your photos and tweaks in the comments—I’m always inspired by the creative spins you put on these recipes. Questions are welcome too; let’s help each other bake (and chill) smarter.
And if you can’t get enough sweet inspiration, explore even more treats on my ChefAlchemy Pinterest page where I share new dessert ideas and decadent creations every day.
Print
Giant Reese’s Peanut Butter Cup
- Total Time: 6 hours 40 minutes
- Yield: 12 servings
Description
If you dream about Reese’s, this Giant Reese’s Peanut Butter Cup is your ultimate dessert fantasy: a no-bake chocolate cookie crust, a thick layer of silky ganache, and a fluffy peanut butter cheesecake filling crowned with a glossy chocolate drip and a pile of peanut butter cups. It’s impressive enough for holidays and birthdays but easy enough for any time you need a show-stopping sweet. This over-the-top treat is perfect when you’re craving easy dessert ideas, indulgent party food, or a fun twist on classic peanut butter and chocolate. Serve it as a make-ahead centerpiece for gatherings, add it to your weekend baking plans, or keep it sliced in the fridge for quick dessert, snack, or late-night treat inspiration.
Ingredients
2 1/2 cups chocolate sandwich cookie crumbs
6 tablespoons unsalted butter melted
1/4 teaspoon fine sea salt
1 cup semi sweet chocolate chips
1/2 cup milk chocolate chips
3/4 cup heavy whipping cream
16 ounces cream cheese softened
1 1/4 cups creamy peanut butter
1 1/2 cups powdered sugar
1 teaspoon vanilla extract
1/4 teaspoon fine sea salt
1 1/4 cups heavy whipping cream cold
1 1/2 cups mini Reeses peanut butter cups chopped
1/4 cup chocolate curls or shavings optional
Instructions
1. Prepare a 9 inch deep dish pie plate or springform pan by lightly greasing the sides and lining the bottom with parchment paper if using a springform.
2. Crush the chocolate sandwich cookies into fine crumbs using a food processor or by sealing them in a zip top bag and crushing with a rolling pin.
3. In a bowl combine the cookie crumbs, melted butter, and fine sea salt until the mixture looks like damp sand and holds together when pressed.
4. Press the crumb mixture firmly into the bottom and slightly up the sides of the prepared pan, using the bottom of a measuring cup to pack it tightly. Chill the crust in the refrigerator while you make the ganache.
5. Place the semi sweet and milk chocolate chips in a heatproof bowl.
6. Heat the heavy whipping cream in a small saucepan over medium heat until it just begins to steam and tiny bubbles appear around the edges but do not let it boil.
7. Pour the hot cream over the chocolate chips and let it sit undisturbed for 2 to 3 minutes.
8. Whisk the mixture gently from the center outward until the chocolate is completely melted and the ganache is smooth and glossy.
9. Reserve about 1/3 cup of the ganache in a small bowl for the drip topping later and keep it at room temperature.
10. Pour the remaining ganache over the chilled crust and spread it into an even layer, then refrigerate for 20 to 30 minutes until just set.
11. For the peanut butter cheesecake, beat the softened cream cheese in a large mixing bowl until completely smooth with no lumps.
12. Add the creamy peanut butter, powdered sugar, vanilla extract, and fine sea salt to the bowl and beat until thick, creamy, and well combined.
13. In a separate chilled bowl whip the cold heavy whipping cream to stiff peaks using a hand mixer or stand mixer.
14. Gently fold the whipped cream into the peanut butter mixture in two or three additions, using a spatula and turning the bowl so you keep as much air in the filling as possible.
15. Spoon the peanut butter cheesecake filling over the set ganache layer and smooth the top with an offset spatula, pressing the filling into the edges of the pan to remove any air pockets.
16. Cover the pan and refrigerate for at least 6 hours or preferably overnight until the filling is firm enough to slice cleanly.
17. When you are ready to decorate, gently warm the reserved ganache in the microwave in very short bursts of about 5 seconds, stirring between each, just until it is pourable but still thick.
18. Run a knife around the edge of the pan if using a springform, then remove the outer ring and transfer the pie to a serving plate.
19. Pour the warmed ganache around the outer edge of the chilled pie, nudging small amounts over the border with a spoon to create drips down the sides, then spread the remaining ganache over the center.
20. Immediately scatter the chopped mini Reeses peanut butter cups over the top, pressing them lightly into the ganache so they adhere.
21. Add chocolate curls or shavings over the candy if using for extra texture and a bakery style finish.
22. Chill the dessert for another 20 to 30 minutes to set the topping before slicing with a sharp knife warmed under hot water and wiped dry between cuts.
Notes
For the best texture, use regular creamy peanut butter, not natural or oil separated styles, which can cause the filling to become grainy or loose.
Make this a day ahead so the layers have plenty of time to set; an overnight chill gives you the cleanest slices and lets the chocolate and peanut butter flavors fully develop.
- Prep Time: 35 minutes
- Cook Time: 5 minutes
- Category: Dessert
- Method: No Bake
- Cuisine: American
Nutrition
- Serving Size: 1 slice
- Calories: 720
- Sugar: 48
- Sodium: 420
- Fat: 52
- Saturated Fat: 26
- Unsaturated Fat: 23
- Trans Fat: 1
- Carbohydrates: 60
- Fiber: 3
- Protein: 11
- Cholesterol: 120
Keywords: giant reeses peanut butter cup, no bake cheesecake, chocolate peanut butter dessert, easy dessert, party dessert, make ahead dessert